Showing posts with label Guide. Show all posts

Thursday, January 30, 2014

Final Fantasy XIV: ARR Crystal Tower: Labyrinth Of The Ancients Guide


Undoubtedly, Crystal Tower has been a major excitement for me for the past three weeks, It's one of the encounter of FFXIV that keeps my head from banging my keyboard, IMO it's perfectly balanced but hey even the easiest encounter is easily trolled right? So here's the breakdown of almost everything about Crytstal Tower

1. The Precursors
Before you can enter this 24-man raid instance, you must first open it's precursor quest, available at level 50 after finishing the main storyline quests, talk to NPC Outlandish Man (X21, Y28) in Mor Dhona, after that you'll have to do three fates and fetch-give typical quests until you unlocked it, pretty straightforward.

2. Trash Mobs (Pool)
Welcome to the first raid wing of Crystal Tower, The Labyrinth of The Ancients. When you first entered here with the other 23 clueless people you will see that you'll be divided in teams A, B and C, also you will be greeted by three pack of trash mobs. Pack one has two Valefors and lots of elementals, Team B should grab all the elementals and tank them in the middle paltform, Team A and C should grab these valefors and their tanks should tank them so their tail whip (AOE Cone from behind) and their front AOE cone doesn't hit anyone except the tanks, also make sure you're standing in one of the heightened platform because during the fights the entire area will be flooded with purple substance that will deal you about 200 damage per second, only the platform is safe. Pack 2 has greater Demon that will knockback the tanks and Valar that will slow everyone with their blizzard attacks. Pack 3 has two Diras that has AOE stun and Cursed Eyes that has petrify front AOE cone, just make sure their AOE didn't hit most of the party and healer shouldn't be petrified and you'll be fine, after that it's time for the first boss

3. Bone Dragon
This will be an easy fight if most people knows what to do, if not then it can be a nightmare, Bone Dragon is waiting at a center platform of the pool and should be tanked there away from the party, around the pools are heightened platforms which will play the role in later phase, as usual the pools will be flooded and drained some times, Team B tank should grab bone dragon and immediately tank it away from everyone (a.k.a turned it around) sine Bone Dragon has devastating front AOE cone that will inflict disease, when he reach about 50% he will summon platinals on his platform, these skeletons must be pulled away to the furthest platform from the boss and killed there, also makes sure that you only have one platinal on each platform, DPS should turn to platinals whenever they spawns, but hold DPS until tanks pulled them to the far platforms, after platinals died turn to Bone Dragon and continue DPS it until it died

When Bone Dragon died the platinals will be revived on their death platforms, here's some things that might happened
a. There's a platinal alive when the Bone Dragon died, when this happened it will RUN back to the boss and sacrificed itself, creating a massive AOE wide room that will nearly halved every non tank players, it can't be slowed, it can't be stunned so your only option is to have to kill it quickly
b. Two or more platinal died in the same platform, when they're revived they will RUN back to the boss, AOE things, etc etc, bad
c. The right one: only one platinal died in a platform, as this happens when they're revived they will WALK back to the boss, giving you time to kill them
After all platinal died for good the Bone Dragon will be revived and the cycle continues

After two phase of resurrection the Bone Dragon will not summon platinals, it will instead summon cursed eyes that should be ignored, it's a healer and DPS burn phase as the terror eyes cast AOE petrify, just keep pummeling the dragon until it bites the dust for good

TLDR:
Team A = Pummel Dragon, keep eye for platinals and pulled them to platforms at West and North West,
Team B = One of the Tank grab the dragon and tank it for the entire encounter, the rest should pulled platinals on platform South and South East
Team C = Pummel Dragon, keep eye for platinals and pulled them to platforms at East and North east,  


4. Atomos

Atomos is an interesting mini boss, there will be three of them in separated paths, which means Team A, B, and C has their own boss (and their own drama :P), in the room you'll see Atomos floating on a platform across the room and there is  another platform in the middle of the room, healers and at least two DPS should stand on this platform As soon as the raid entered their rooms, otherwise it will spawn Iron Giant that will insta-kill the team (9999 damage FTW!!), if one team got wiped everyone failed so it's bad. You will need FOUR people on the platform which means two healers and two DPS which can be a bit problematic if you have all melee DPSer, you can tried to switch with other team or just go ahead with it and have the other free DPS take down Atomos

Atomos doesn't need a tank, it doesn't even attack, but the catch is he'll spawn Valefors, Diras, and Greater Demons throughout the fight, and they should be tanked between platforms by the tanks so DPS standing at the platform can kill them without leaving it, if there's only melee DPS on platform tank should be tanking it near the middle platform so they can hit it, careful with their AOE though.

TLDR: Healers and two dps stand in the middle platform, tank grab adds, platform DPS kill adds, free DPS kill Atomos

5. Thanatos

Thanatos fight is a chaos and will put everyone (especially healers) on their toes, there are three magic pot that can be healed and buffed with stoneskin around the room, your job is to keep them alive, Thanatos can only be damaged if you have the 'Astral Alignment' buff granted by the magic pots, Team A should grab Thanatos first and tanked it in a corner of the room, their magic pot will surely give them the buff, after that it will be a random.
Throughout the fight there will be two type of adds: Sandman and Nemesis, Sandman will move slowly (can't be slowed, stunned, or provoked) to the pots and cast bravery on them, leading them to Thanatos (which will destroy it), Nemesis will spawn in great numbers, throwing AOE indiscriminately (also dangerous for the pots), non-buffed people should prioritize sandman and gain attention of the nemesis, leading them away from the pots, buffed people should burn Thanatos, healers must switch between pots and players which can be chaotic

TLDR: Tanks immediately grab Thanatos when buffed, careful when switching target when the buff wears off since the next buffed tank should grab aggro first, DPS when buffed = Thanatos, non buffed = Sandman > Nemesis, Healers = heal everything including the pots

6. Allagan Bomb


There are three Vassagos guarding The Allagan Bomb, The Allagan Bomb itself is invulnerable as long as the Vassago's alive, each team should grab their own vassago and tank it away from the team, throghout the fight there will be Allagan Bombs and Napalms, DPS should kill these immediately as they float slowly to the Allagan Bomb at the center and will explode inflicting room-wide AOE, Vassagos has strong cone physical attacks and they will occasionally cast desolation a randomly targeted AOE Line, they will occasionally filled a part of the platform with lava that force the tank to move and tanked him in a different position, avoid these three and you're done, when Vassagos died turn your attention to Allagan Bomb, kill it before it explodes and wipe you

7. King Behemoth

Meet the PUGbreaker, this is the hardest fight on CT, There are several mechanics that should be paid attention, otherwise, it'll be a wipe

a. There are towers around the outside Arena, throghout the fight you will be hit by constant DOT of electricity, when a tower glow red it adds several damage to your debuff, you can turn this off by simply clicking them, but this will deal you damage, so preferrably tanks should do this
b. Behemoth only needs one tank but there are several random hard-hitting AOE that comes from him, avoid these, the tank is usually is from team B

So when team B grabbed the behemoth and tank it on the corner, facing outside,  team A should be on the center since there will be two of an annoying adds called Puroboros, they spawned in the center and move slowly towards towers, if they arrived they will explode, damaging the tower and put you another stack of debuff, Team C should grab another add called the Iron Giant, tank it and kill it ASAP as it will destroy your only mean of survival, the comet

The comets will fall from the sky, indicated by green icon above a player head, wherever he/she is that's where the comet will be so tread carefully since you don't want it falls near the iron giant that will destroy it, sometimes during the fight the King will shout GGRRAAAAAGHH!!! (or something) as he cast ecliptic meteor (9999 damage again!), this your cue to HIDE BEHIND THE COMET, just put the comet between the behemoth and you, effectively cutting it's line of sight, when the Meteor hits it will destroy the comets and you're back to phase one, mind you at this hiding phase Puroboros will still spawn, and at about 25% there will be several tornadoes on the side of the room that will kill you and destroy the comet if you got near them

TLDR:
Team A = grab Puroboros, kill it before it reach the towers, deactivate red towers
Team B = tank and DPS behemoth
Team C = tank and DPS iron giant, help kills puroboros, deactivate red towers

8. Acheron

Acheron is the last boss and also a disappointment since he's the easiest boss in CT, but although his mechanic are so easy it also can be wiped. At first as usual Tank B should grab it and face it away, he has several line, cornered, and cone AOE, nothing unavoidable, their damage is also can be shrugged off if your healer's good, throghout the fight he'll summon Iron Claws that will grab one of your team member (usually healer or ranged DPS), drained their HPs and stunned them, this must be killed ASAP

After some damage Acheron will walk into the center of the arena and cast Ancient Flare, another insta-kill move, there are three patforms on the East, West and South corner of the arena, Team A should grab West, B = South, and C = East, when at least one person in the platform it will put up a shield that contains the Ancient Flare, after that an iron giant and occasionally an Iron Claw will spawn on the platforms, kill them ASAP as you need to move back to the arena and the platform will be drowned in lava

After that it's practically rinse and repeat, there are several unavoidable skill on last phase like Demi that will cut everyone's health in half and quake that will deal heavy earth damage but nothing that will taxed your healer, just burn him and enjoy the cutscene

Congratulations, you've beaten the Crystal Tower....well....not, it's only one area =))

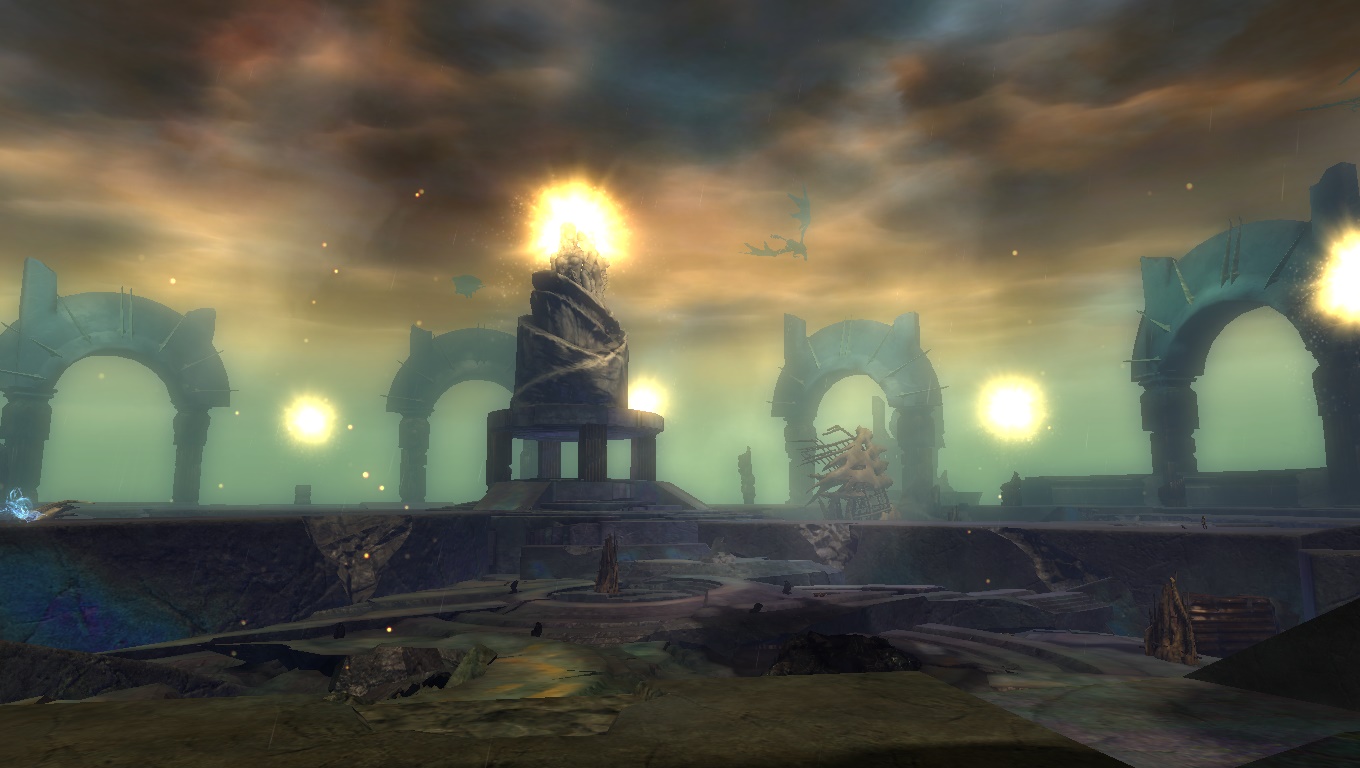
Image courtesy of: USGamer
Their own guide:

Monday, April 1, 2013

The Five Temples of Orr: Temple of Melandru & Temple of Grenth

Since Temple of Melandru is the most straightforward event (and a very bugged one) I'll post it with Temple of Grenth's strategy

Temple of Melandru

Melandru: Goddess of nature, earth, and growth worshipped by her Orrian's follower on the Cathdral of Verdance, the events leading to the cleansing of her temple is probably the most bugged events in Guild Wars 2

a. Escort Magister Izzmek to the site of the first signal beacon
Magister Izzmek resides on Gavbeorn's landing, and it has to be reclaimed before he can move out (though due to some bugs he won't budge), it's straightforward, just escort him through three beacons and you're set, though sometimes he's bugged and will halt halfway

b. Legendary Fight: Destroy the Risen Priest of Melandru
he's though, but his attacks aren't deadly, the most annoying thing when his HP is depleted he'll turn everyone near him into animals and summon five acolytes to regenerate his health (he's invulnerable to attacks at this state), you must quickly dispatch these acloytes in your animal form to prevent his HP to go out to full
BUG: sometimes he won't turn you into an animal and you can continue to hit him until he's down

c. Defend the Pact interrupter device while it charges to cleanse the temple
Another straightforward mission, just defend the device, it has some HP and can withstand some blows, get ready to kite the Champion Abomination around due to it's stacking frenzy, kill the Champion Risen Spider before it can spawn smaller spiders

After the device is online Lightbringer Surefoot will light up his karma store for you

Note: every now and then the risen will tried to destroy the pact interruptor with the event Defend the Pact interruptor from Risen attacks, it's Risen Priest again combined with Champion Spiders, Abominations, and Gorillas

Temple of Grenth

Grenth the God of Ice and Death, his temple is the Cathedral of Silence on an island in the southwest corner of Cursed Shore, and it's cleansing event is the most engaging event ever. first and foremost you must escort the pact from the northernmost tip of the island until it reaches the first event below


c. Ensure that Keeper Jonez Deadrun reaches the Cathedral of Silence
This is where the fun begins, Jonez has a small amount of HP and by the number of people joining the event it can scale up into where the mobs can one hit Jonez, keep them away from him at all costs, especially those bow guardian that can inflict confused condition

d. Legendary Fight: Protect Keeper Jonez Deadrun and destroy the Champion Risen Priest of Grenth
Welcome to hell! there's a LOT of things that you have to remember and DO at this fight

1. Champion Risen Priest of Grenth will one shot Jonez most of the time so keep him at the back of all cost, far away from Jonez, his attack are deadly, it'll spawn AOE brown whirlpools that will throw player up to the air where they'll receive falling damage (on slow connection it'll inflict MULTIPLE falling damage and you'll be defeated instantly), another is spawning ice fields that WILL kill you and inflict chill if you're somehow survived, this is the main problem, dying on this fight is dangerous and annoying since it'll push your ressurrectors to the limit while evading those attacks

2. Shades is your number two number one problem, it has much HP but it didn't do much damage but again it'll give you a stacking corruption when they hit you, after you gain 25 of it you'll be downed instantly. The Shades cant be damaged through a normal means though, there are two brown whirlpools on the left and right corner of the room you must step on it to gain "Entered Grenth Realm" debuff which will give you deathshroud-like appearance, now you can damage the shades but be careful they will inflict more damage to you and stack more corruption when you're in this form, also the brown whirlpool can be re-entered, effectively removing you from the "Entered" debuff which can be annoying when you're shooting shades from afar, since it can't be re-entered again immediately, when you're down you're losing the corruption stacks and the entered debuff. in the past patch you can't ress someone in this state, now you can, thank you Anet, although no thanks for you for giving us endless waves of shades, yes endless, they won't stop spawning although the last wave has not been dispatched, giving you a black nightmare

3. Mobs: there can be hundreds of them, spawning around Grenth's Priest and on the corner of the room, spectral, shades, risen, everything, be sure to get rid of them before they fill your screen (literally)

4. There's no waypoint near this area, the nearest is Anchorage Waypoint which sometimes contested due to bug or assault to Arah, so when you're defeated don't wait for ress because it'll be a long walk for you
 

e. Cover Keeper Jonez Deadrun as he performs the cleansing ritual
No, all the chaos hasn't over yet, now come the finale, ress everyone, take any buffs, since hundreds of mobs will spawn from every corner of the temple and tried to take out Jonez, kill them, kill them immediately, sometimes they'll spawn RIGHT IN THE MIDDLE OF HIM which will give you a headache, just interrupt them, launch, knocdown, or whatever your arsenal can do, watch for Champion Risen Spiders and Wraiths that can summons reinforcement, well actually the true enemy in this fight is the lag and the culling which can hinder your performance on this fight

Note: If Jonez defeated on any event he'll come back to his tent on Death's Gaze Touch and sleep for approximately 15 minutes before the event restarted from point a. again

Congratulations! wipe your sweat while enjoying Karma items from Jonez, it's practically the same with the other temples but since you've beaten the most difficult of them you deserved an achievement, there's one? No, let's petition Anet for one =))

Tuesday, March 26, 2013

The Five Temples Of Orr: Temple of Dwayna

Excerpt from Thelemic Influence Hunt (Every Tuesday, Darkhaven Server 21.00 GMT+7)

Dwayna is the Goddess of Life and the leader of the original six gods of humans, her temple is the Cathedral of Zephyr and the quest to reclaim it is related to a lore:


"When the gods Balthazar, Dwayna, Grenth, Kormir[sic], Lyssa and Melandru arrived in Tyria, it was impossible, because of their divine nature, to appear before human eyes without blinding them.

Thus they decided to fetch a sculptor, so that he could shape statues in their image.

When the eyes of the sculptor Malchor, fell upon the face of Dwayna, his heart was instantly filled with a pure and unconditional love. It became impossible for him to turn down any of Dwayna's requests. And thus the creation of the statues was commenced.

One after another, the gods presented themselves in his studio and for each one Malchor carved a statue in their image. Once a statue was finished, the God returned to the city of Arah, where no human could enter.

So it was that Dwayna finally entered the studio of the sculptor. Malchor sublimated his art so that all the grace and beauty of the Goddess radiated from his statue. And as long as he worked on the statue, as long could he enjoy the infinite happiness which the presence of Dwayna gave him.

Alas then came the fateful moment when the statue was completed, and where the goddess would leave for Arah. Unable to bear the despair that grasped him when the figure of the goddess had disappeared from the horizon; he threw himself from a cliff.
The place where Malchor lost his life now bears his name: the Strait of Malchor."

— The Story of Malchor And Dwayna
From: Guild Wars 2 Wiki


A. Escort Historian Vermoth to the Altar of Tempests
Historian Vermoth can be tricky to find, his spawn point is usually on the south-south east of the temple, simply talk to him to start the event, it's an easy fight (for a group)

B. Defeat the Risen Priestess of Dwayna
She's been buffed by the game's patch from time to time, her current incarnation now can throw wind glaives that returns to her, dealing double damage if you're standing still on it's path, pull you several times and deals a heavy melee damage, she also summons a lot of veteran risen knight with it's devastating earth spike attacks, she'll also teleport from time to time, making a really dirty job for melee preferers.

C. Drive Malchor to the Altar of Tempests
After she goes down the Historian will tell you that the statue of Dwayna in the temple is protected by a barrier which only Malchor's can dispel and he can't cleanse the temple without first dispelling it. Your job is now to find Malchor's spirit on the far west of the temple and drive him to the barrier. After you find him talk to him and it'll start an event where you will drive him towards the temple and occasionally fighting him, on the way he'll tell you how he failed abymsally to recreate first Dwayna's statue (you'll see some of his failed recreation on the first area where you find him), it's more of a story to an event

d. Legendary Fight: Defeat the Possessed statue of Dwayna
After Malchor's finally resolved to free the temple from Zhaitan's corruption he'll break the seal which will make the Statue of Dwayna came alive and summon Malchor's chisel, take out the chisels and hammers first since they'll knockback and stun you, other than that they're easy.
The Corrupted Statue of Dwayna itself has gone from lootfest to wipefest, she has two major attack, one is a fire AOE that can take out half of your HP if you're not investing on vit or toughness, usually followed by ghostfire AOE that aim on random party members and deal MEGA damage, she will from time to time use this rotation.
To counter her attacks always heal after hit by the fire AOE, use ranged weapon so you won't get hit by it since it has a somewhat short-medium range, watch out for ghostfire attack, when she shoots a needle to the sky, DODGE! because half a second later ghostfires will rain down upon your party, each of these will create an AOE so if you're not so lucky and landed near two of it you'll be guaranteed to go down, also spread out to minimize this attack's effect, still standing players must work quick to ress their teammates and the one who didn't get a ress must quickly rally.
After several minutes of nightmare she'll goes down and you'll free to loot her chest and listen to Malchor's final rant, Historian vermoth will open up his inventory for you, Rune of Dwayna boost your healing power stat and also apply regen to teammates, a good choice for support players.


Saturday, March 23, 2013

The Five Temples of Orr: Temple of Lyssa

Excerpt from Thelemic Influence Hunt (Every Tuesday, Darkhaven Server 21.00 GMT+7)

Cathedral of Eternal Radiance is a temple dedicated to the twin Gods of Illusion Lyssa, it's located on Malchor's Leap, east of Straits of Devastation, on it's current condition the temple is a major battlefield where you must attack and defend some spot on the temple before engaging the Risen High Priestess of Lyssa itself. The circular layout of the temple is a deathtrap, filled with endless spawned Risen, Spectrals, and Abominations and you'll be constantly harassed by the risen catapults erected around the temple

There are three points that must be defended from the horde of risen, they are:

A. Protect the Pact golems until they charge the neutralizer device
This event located in the northwest corner of the temple, there are several golems here, most of them are offline, you must click the glowing tower surrounded the area and throw the charging orb into the golems, they'll come alive and will continue gathering the charge for the neutralizing device, in this moment you'll be attacked by several risen, just keep them away from the golems, after the neutralizing device fully charged the event is completed

B. Defeat the Risen forces before they construct fortifications around the Seal of Union
The Seal of union containing Lyssa Waypoint is on the northeast corner of the map, ignore the risen if you can, all you have to do is destroy the ribcages around the waypoint after it's fully destroyed the waypoint become uncontested and you can use it. It's essential to rally all people from the area.

Additional Information: on the defend the waypoint event after you claim it, there will be a champion Risen Wraith that can FEAR you so you'll fall out of the platform into the body of water below (or landed on the bottom floor if you're not that lucky), it's annoying to go around and get into the waypoint again (which will be contested during the event) so all you have to do is kill it quickly while prevent him to contruct more ribcages

C.Defend the Seal of Lyss until the Pact cannon is online
This is the last and most difficult takedown event on this meta, there are three NPC that must be resurrected and protected while they contruct the cannon, unfortunately they will take their time, sometimes abandoning it to engage newly spawned risen, keep the risen away from them at all costs especially the Veteran Abominations with stacked frenzy, it can take a long time, depending on how you perform well on keeping the risen away from the NPC

Only after completing all these events you can engage the corrupted priestess of Lyssa

D.  Legendary Fight: Kill the Corrupted High Priestess
Here you go, have a go with the priestess, she's located in the center of the temple, she can evade, block, blink, daze, running around, but her attacks doesn't really damaging, it's just annoying. BEWARE: every now and then the three seal that you claimed will be attacked again, don't let it fail! just don't! send a defend team or split your party (see additional information above), if one seal failed the priestess will be invulnerable and reset and so you must liberate the seal once again before engaging her.

And every now and then too the corrupted priestess will use his ultimate attack (Corrupted Gaze), everyone that is facing her will be dazed continuously it has a long range and she'll be completely invulnerable during this moment, so face away from her, easy? nah, she'll summon a LOT of risen during this moment and they'll out for your blood, you must engage these while not facing her, a mesmer can use his fourth focus skill to dislocate the risen, use a lot of AOE, when the Corrupted Gaze ended she'll be vulnerable again, just remember that she has a lot of HP.

When she's downed (after 10 mins or so) the temple will be cleansed, chest will spawn, and Lightbringer Brutefur will open up his karma shop for you, Lyssa has a good superior rune that you should check out, on the 5th rune you can activate elite skill to gain all boons and lose all condition, it's an awesome choice for any profession. 

Link: My guild's video during the opening of Lyssa's (and Grenth) temple


Friday, March 22, 2013

The Five Temples of Orr: Temple of Balthazar

Excerpt from Thelemic Influence Hunt (Every Tuesday, Darkhaven Server 21.00 GMT+7)

Orr was a devout country dedicated to the five original Gods of humans, it sunks into the depth of ocean before the Elder Undead Dragon Zhaitan raised it and it's dead denizens as minions, now the five temple of gods are also corrupted and cleansing them is a group event worthy of a big rewarding chest


Balthazar the God of War has a temple called Cathedral of Glorious Victory on Straits of Devastation, the first part of Orr. The pre-event must be completed if you want to liberate the temple, all of them are group event and can be a drag (almost impossible) if you do it solo, they are:

A. Escort The Invasion Pact
- Escort the northern invasion Pact squad to the Pact rally point at Triumph Plaza. Begins at Royal Forum Waypoint
- Escort the central invasion Pact squad to the Pact rally point at Triumph Plaza. Begins at Armada Harbor in Fort Trinity
- Escort the southern invasion Pact squad to the Pact rally point at Triumph Plaza. Begins at Fort Trinity.

Note: You can do one of any of these chain events, but if another escort event have been triggered you must finish it before the next progress can be started

B. Help the Pact reach the Altar of Betrayal before their morale is depleted
This is probably the most annoying escort mission on all Guild wars 2, the pact force consists of some NPC and when one of them killed their overall morale depleted, they have little HP and can't be revived but can be healed with wells and AOE heals. The NPCs are also like to rush the risen so it's your job to get the risen before they got the NPCs, sometimes Risen spawned right in the middle of the NPCs and must be interrupted/knockback before they do much damage to them. the NPCs are also like to bug out, stopped in their path, halted the entire progress of the mission and locked the temple of Balthazar until the next server reset =((

C.  Seize the Altar of Betrayal before Pact morale can be broken
When the pact troops arrived on the temple it become the defend area mission, just wipe all the spawned risen before they got to the big blue defend area and you'll be fine

D. Legendary Fight: Defeat the Risen Priest of Balthazar before it can summon a horde of Risen
This is the final mission on liberating the temple of Balthazar, the Risen Priest of Balthazar can do a one-hit-kill AOE well, summon Risen Acolyte that will heal him, and when you thought you're safe after dodging a well he fears you to it =)) and yeah he also have TONS of HP and 10 minutes countdown before he summons a horde of risen, despawn, and failed the mission.

The key to this fight is to kill the risen acolytes as soon as they spawn and watch for the priest's AOE, if you're defeated just get back to the Rally Waypoint and run from there, it's not that far, you'll probably need 20++ people for this fight. It's somewhat hard since you have to sometimes switch DPS for the risen acolyte and still must have a good chunk for the Risen Priest to counter the timer, after he goes down the pact will liberate the temple, a big chest will spawn (Rare guaranteed now) and Tactician Deathstrider will set upa a shop selling the +prec +tough +cond damage Armageddon Armors and Obsidian Shard for your Legendary needs